Organize Stories
Activities That Help Your Students Shape Their Ideas
How to organize stories may well be the toughest of the writing traits to master! Try these fun hands-on activities and creative writing tips to help your students shape their ideas! Structuring a plot so that it makes sense to the reader is the essence of the organization trait. This trait works hand-in-glove with the ideas trait, because it is the ideas, ultimately, that are rearranged in a sensible fashion to convey a clear, exciting story. Organization may indeed be the most difficult trait for students to master. This may be because many students lack exposure to a wider range of quality fiction and nonfiction. Often they are fed a steady diet of one particular genre, such as fantasy, so they don't hear, see, and internalize the structures of other topics.
Here are some tips for introducing the trait of organization, as you prepare your students to organize stories:
- Provide lots of quality picture books and chapter books that showcase stories through good organization.
- During small group or whole class discussions about specific pieces of writing, ask questions such as, "What comes next?", "And then?", "How can you bridge from this idea to the next one?", "What's the most important part of your plot?", "How does this compare with that?", "What's the last thing that happened?", "How do these two ideas connect?", and "What does this have to do with that?" Use these answers to help your students with organization.
- Prod your class to think about cause-and-effect relationships in daily life. For example, if a child is working with tempera paints and fails to put the jar lids on tightly, the paints dry out. This can lead students to apply a cause-and-effect structure to their next piece of writing, especially if you help them make a connection.
- Use other content areas of the curriculum to show how organization appears in everyday life. For example, song lyrics are often organized by stanzas. In science, students use sequential steps to conduct experiments. For written mathematics responses, students must logically explain how they arrived at their answers.
Now that we've looked at some ways for introducing and reinforcing the general concept of organization, let's experiment with creative, hands-on activities that teach the basic principles of how to organize stories. Once kids understand these principles, it's much easier to apply them to writing.
Organize Stories with Bright Beginnings
When a story opens with, "This is about...," readers hit the mental snooze button. But when a story jumps in with, "BOOM! I jolted awake, my heart pounding!" readers are piqued. They immediately want in on the action. Here are a few of my favorite effective techniques for teaching kids to open their plots with a BOOM! Ring Leaders. Creating a collection of interesting, teasing leads can inspire young writers who are looking for ideas. In this activity, you and your class write intriguing leads on index cards, organize them by technique, and snap them on a loose-leaf ring for easy access. Here's how: as a class, create roughly five new leads for each of the techniques below, printing the technique on the front of the card and the lead on the back:
- Lights, Camera, Action! The writer makes something happen.
- Example: "For the last time," my dad said, "hang up your coat."
- The Single Word. The writer sets off an important word by itself and follows it with more information.
- Example: Coats. Coats were everywhere. They were pulled from the closet, scattered over the floor. A single envelope peeped from the pocket of my winter blazer.
- Fascinating Fact. The writer presents an intriguing nugget of information.
- Example: My jacket wouldn't fit. How strange, I thought. It fit perfectly just a few minutes ago.
- Imagine This. The writer captures a moment in words or pictures.
- Example: My toddler sister, in her down jacket, waddled like a pink penguin in the backyard.
- It's Just My Opinion. The writer states a belief.
- Example: Kids shouldn't have to wear their coats if they don't want to.
- Listen Up! The writer describes a sound.
- Example: Zip, zap, zip!
- I Wonder? The writer asks a question or a series of questions.
- Example: Have you ever wondered how many coats or jackets you could pull on at once? Two? Three? More?
Keep this collection of ring leaders handy as a resource for students as they set about to organize stories. Now, here are additional activities to organize stories with bright, bold beginnings.
 IT's My Life! Ask your class to pretend that a famous film producer will document their life stories. Have the kids illustrate the opening scenes of their movies, using a variety of media: paper, pencils, markers, watercolors, magazine images, and the like. Remind your students that great autobiographies don't always start with the subject's birth! Many times they begin with an important event in the subject's life, a strong personal belief that has influenced the subject's choices, or a description of a meaningful person or place. From there, have students share and explain their illustrations to their classmates.
Get Hooked! Collect a few age appropriate videos and show just the first minute or two of each one. Ask your class to evaluate the effectiveness of the openings. Were there comic moments at the very beginnings? Perhaps a character said something interesting or unusual. Or maybe thrilling colors, graphics, or music hooked the viewer. Discuss the various openings used by movie and television scripts and their implications for preparing to organize stories.
Organize Stories with Meaty Middles
There are a myriad of ways to help kids structure the bodies of their stories, essays, and papers. They can compare and contrast ideas, examine cause-and-effect relationships, or make predictions. The purpose for writing should drive decisions about organization. In essays, key points listed in order of importance may be useful. As kids prepare to organize stories, however, chronological order is generally more helpful in developing the action of the plot. What follows are a few hands-on activities for helping your students understand the importance of mighy, meaty middles. The Shopping Spree. Grocery stores are organized logically, each clearly marked and stocked with similar items so that shoppers can easily find what they want. In this activity, your students categorize real grocery items and learn an importane lesson about organization. Bring in a
plethora of empty boxes, cans, and bottles from at least five categories: canned goods, cereal, crackers and chips, condiments, paper goods, and storage materials such as aluminum foil, plastic wrap, and sandwich bags. Spread the items out on a large table and divide the class into five teams. Each team will have three minutes to sort the groceries into categories of their choice: color, size, shape, weight, material, cost, food group, and so forth. Rotate through the teams, letting students sort and re-sort groceries in different ways. After all teams have had the opportunity to design their own "store", ask each team to draw a picture of their organizational plan. If they chose to organize groceries by packaging, then illustrate the types of packaging. If they chose to categorize by food group, then illustrate the types of foods. Have each team write a caption for their picture that best describes their organizational method. Post the drawings, and then lead a class discussion about different ways to organize stories by classifying details in interesting, unusual ways.
Back Atcha! Here's a fun round-robin game for practicing effective transitional words and phrases. Explain to students that you will begin telling a story. When you stop and say, "Back atcha!", the student you point to must continue the story by adding a sentence or finishing the last sentence another way. The only rule is that nobody can use the phrase "and then." For example, you start the story by saying, "I peered out the window and saw green lights glowing." The student may respond, "The lights bobbed up and down in the driveway." That student then sends it back to you by saying, "Back atcha!" Continue the story, keeping the ideas flowing in a sensible order by sending it out to other students until you decide to end it.
Time Passages. Have the class brainstorm words and phrases that suggest the passage of time, such as while I lay dreaming; a long day passed; next month we'll...; later that night, and so on. Have each student illustrate these phrases in various media. Discuss with your class the implications of smooth passages as they organize stories.
Organize Stories with Graphic Aids Venn diagrams, T-charts, semantic webs, and story flow maps are excellent aids for helping kids organize their ideas before they write because they give kids a plan for unfolding their thoughts.
Now that we've examined some effective activities for helping your students understand the importance of developing meaty middles, let's try a few activities to demonstrate how to organize stories with effective endings.
Organize Stories with Effective Endings
Wrapping up a plot is a challenge. Ask any writer! That's probably why a lot of youthful writers cap off their tales with something like, "I hope you liked my story", "Now you know three reasons why the sun rises in the east and sets in the west", or that perennial favorite, "The end." But we can actively direct our students to examine endings and the elements of effective endings. Here are a few favorite activities to inspire young writers to wrap up their writing so that it lingers in readers' minds.Endings That Work. As a class, read aloud and discuss the endings of high-quality picture books. Do the authors wrap up the stories convincingly, dig deep, or work with a big idea? Record your answers on the board, organizing the endings by specific methods. Encourage your students to look for patterns and techniques and discuss how these methods can be applied to their own writing.
 The Camera Lens. Ask students to imagine they are holding cameras with powerful zoom lenses. Have them hold their cameras up to their eyes, focus on a subject, and tell you what they see as they zoom in. Have them zoom in closer to focus on one small detail and describe it. If they are photographing a tree, they could focus on the ridges in the bark, an ant strolling up the trunk, or a lone leaf clinging to a twig. Explain to your students that a highly focused detail can make an effective ending. By being very specific, readers can mentally picture the ending alongside the writer. Now ask students to zoom out to get a picture of the classroom, school, and surrounding neighborhood. Perhaps they can view the cars in the parking lot, the landscaping around the buildings, or the houses nearby. Tell your class that this wide-angle view also works well in wrapping up a story. Sometimes writers close the action by leaving their readers with a big picture of the theme or idea. Ask each student to experiment with a current rough draft they are working on and try both techniques. Which one works best?
Ring Enders. Using the format for Ring Leaders, explained above, help students create a collection of endings for use as a reference. These may include:
- A wise thought: Stealing your sister's coat can be a big problem!
- A surprise: When I opened the coat closet, it stood empty.
- A quote: "Let's go shopping for that jacket," my mom smiled.
- A tie-up: We won't forget that coat!
- A question: "Did you see my coat?" my sister asked.
- A challenge: Next time, we'll see who wears that magic sweater!
- A sign of what is to come: I knew my sister would discover that mysterious jacket one day!
- A laugh: My mom will never forget that painted coat!
Learning to organize stories requires some head scratching, but the payoff is fabulous! Encourage your class to write often, closely examine models, and try a number of techniques in their writing. This will increase their ability to effectively organize their ideas with style and clarity.
However, leave the door ajar for surprises along the way, as your students' unique voices shine through!
Return from Organize Stories to Creative Writing Tips
Return from Organize Stories to Creative Writing Ideas and Activities
Helping You Write Across the Curriculum!
copyright 2009-2013 www.creative-writing-ideas-and-activities.com
Our Most Popular Pages
5. Writing a Personal Narritive
10. Elements of Persuasive Writing
Recommeded Resources:
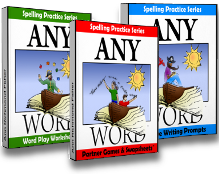
AnyWord(TM) Spelling Practice Series!
Worksheets, games and activities to use with any spelling words. Three volumes in all!
Stop Essay Pain!
LitWorks.com
Resources to help students prepare for literature examinations.
Teach Kids Drama!


